The ArdEx Hex file is a ready-to-install image for the Arduino UNO. This page covers briefly what is required to install this software on an Arduino from a Windows environment.
This will use avrdude which is part of the Arduino development software bundle, which you may have already loaded on your PC. If not, it's probably best to install the whole bundle, even though all you want is one small program. I looked around but wasn't confident in any of the smaller downloads I found.
NOTE: avrdude (and the rest of the Arduino environment) is only required to install ArdEx on the Arduino(s). Once installed, ArdEx uses a simple terminal emulator which might be on a Windows, Mac or Linux computer.
With the Arduino development environment installed, download ardex.zip and unpack it to a folder you know. (I don't like Windows' default behaviour and have created a c:\Temp folder which I use for all these "throwaway" tasks). Note the complete filename; in my case it is c:\Temp\ardex.hex.
Plug your Arduino UNO into the USB port.
Start a Command/DOS prompt window.
Bring up the Device Manager to see what serial port the Arduino has been given. You can do this using Windows menus, or by entering:
devmgmt.msc
In the Device Manager, click on the Ports item and you should see your Arduino listed with a COM port like this:
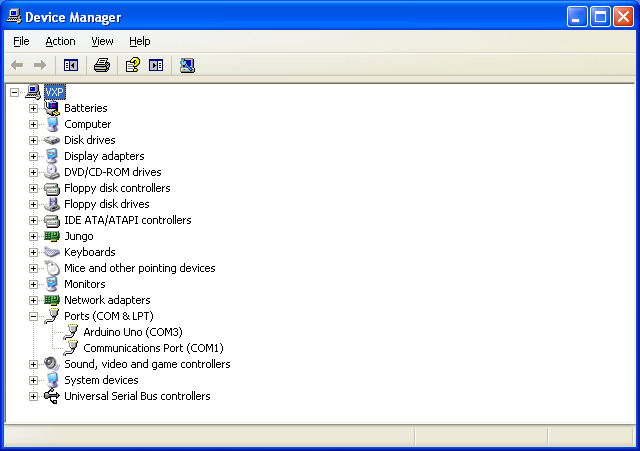
If you're using a non-genuine Arduino it may not be so obvious. Try unplugging and replugging the USB cable to see which port is affected.
Note the port name; in this case, COM3.
You now have everything needed to install ArdEx. In my case, I typed the following into the Command window:
cd c:\Program Files\Arduino\hardware\tools\avr\bin
avrdude -C ..\etc\avrdude.conf -q -V -p atmega328p -D -c arduino -b 115200 -P COM3 -U flash:w:c:\Temp\ardex.hex:i
You will want to substitute your port and file names for COM3 and c:\Temp\ardex.hex above.
If everything goes to plan, you should see something like this:
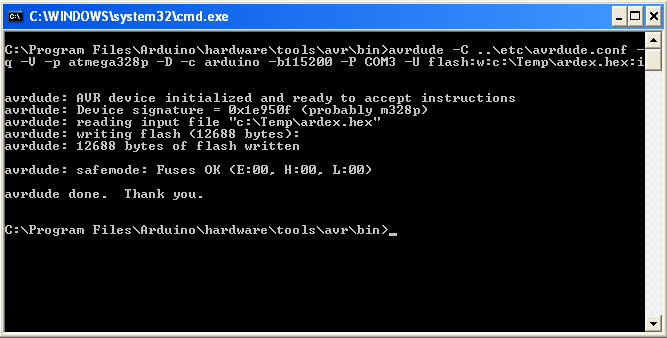
Congratulations, ArdEx is now loaded on your Arduino.
Note: you can repeat the above steps to install ArdEx on several Arduino UNOs which is convenient in a teaching environment.
Using ArdEx
All that is required is a communications terminal that can connect with USB serial ports. On old versions of Windows, HyperTerm works fine. Alternatively PuTTY is popular and does the job. If you don't have one already installed, TeraTerm does everything needed. Let's assume you're going with it.
Once you have downloaded and installed TeraTerm, plug in your Arduino and start TeraTerm.
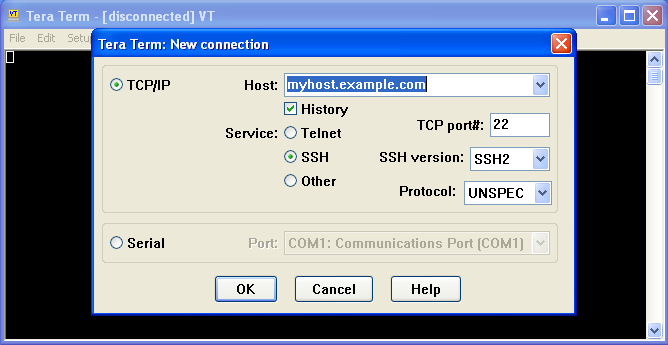
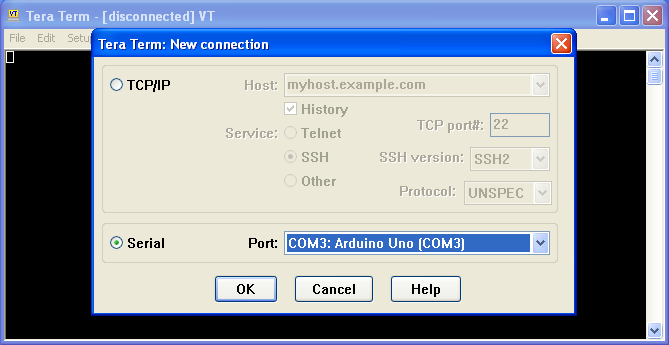
You want to click on the Serial button and select the correct Port from the list.
ArdEx needs to communicate at a higher speed than the default. We need to configure the serial port accordingly. Select Serial Port... from the Setup menu.

Now configure the Speed to be 19200, and the Transmit delay to 20ms per line (this allows ArdEx to keep up with programs entered using cut and paste).
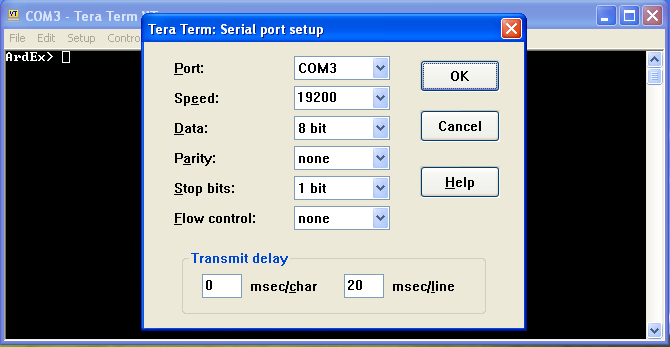
Finally, save this configuration so that you won't have to re-enter it every time you start a session.
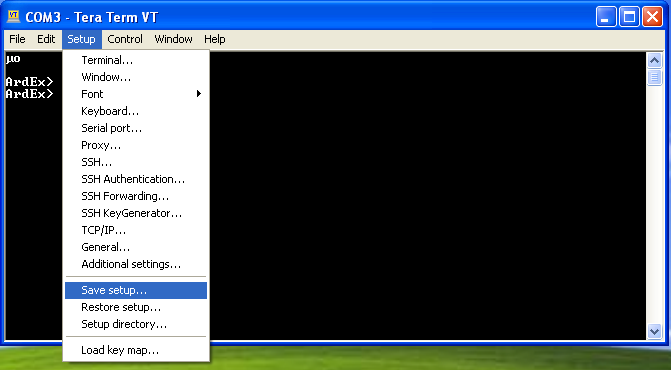
Save to the default name "TERATERM" and everything will be right next time.
Here is a quick ArdEx session with the Blinky program.
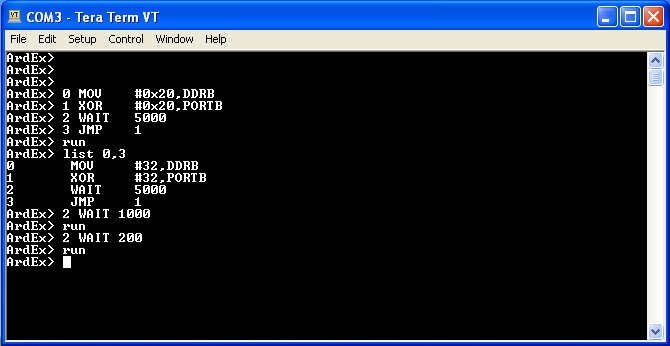
Each time run was entered, the LED started blinking. Firstly with half a second on, half a second off, working out at a one second period for the cycle. The program was stopped using <ctrl>-C and the WAIT instruction changed so it was 5 cycles per second. The third run it was 25 per second. This is a handy environment for quick experiments.
While the interactive environment is fun for simple programs, more complicated programs are better edited on a PC in Notepad (or another text editor) and entered into ArdEx with copy and paste or, better yet, with TeraTerm's File -> Send File... menu item.
Job done! Hope it went well for you.
Contact
I'm not much of a Windows user (as you can probably tell from the XP screenshots), so please e-mail suggested improvements to ardex@robswan.com.au.