
Dashboard display lists are mostly easy to understand: put the virtual pen somewhere, then draw something. But the RLE instructions aren't so obvious. The thing is that you need to use them if you want to get fancy.
RLE stands for run length encoding (as used in fax
machines). It is a way of reducing the size of certain images.
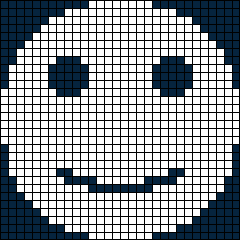
Here is an iconic image, 30x30 pixels, and a zoomed-in version.
As you can see, the image is made up of two colours: foreground and background. Using 1 for foreground and 0 for background, you could encode this image as:
000000000001111111100000000000
000000001111111111111100000000
000000111111111111111111000000
000001111111111111111111100000
000011111111111111111111110000
000111111111111111111111111000
001111111111111111111111111100
001111100011111111110001111100
011111000001111111100000111110
011111000001111111100000111110
011111000001111111100000111110
111111100011111111110001111111
111111111111111111111111111111
111111111111111111111111111111
111111111111111111111111111111
111111111111111111111111111111
111111111111111111111111111111
111111111111111111111111111111
011111111111111111111111111110
011111111111111111111111111110
011111111111111111111111111110
011111100111111111111001111110
001111110000111111000011111100
001111111110000000011111111100
000111111111111111111111111000
000011111111111111111111110000
000001111111111111111111100000
000000111111111111111111000000
000000001111111111111100000000
000000000001111111100000000000
Manually converting the pixelated image to zeros and ones (not much fun) you find that what you really do is count how many dark pixels, then type that many zeros, then count the white pixels and type that many ones, and so on. You're counting the length of each run. That's all that run length encoding means.
So our icon can be pared down to:
11,8,19,14,14,18,11,20,9,22,7,24,5,26,4,5,3,10,3,5,3,5,5,
8,5,5,2,5,5,8,5,5,2,5,5,8,5,5,1,7,3,10,3,187,1,28,2,28,2,
28,2,6,2,12,2,6,3,6,4,6,4,6,4,9,8,9,5,24,7,22,9,20,11,18,
14,14,19,8,11
11 background, 8 foreground, 19 background, 14 foreground ... you get the idea. Notice we don't care about wrapping around at the end of each row. If the next row starts with the same colour, keep on counting. As long as you know that the main image is 30x30 pixels,, and that the first pixel is in background colour, you can rebuild it from this set of 79 numbers.
Don't get alarmed. This counting pixels business is not for humans — that's the computer's job — it was just to show that there's nothing all that magical going on.
We'll use the smiley face, but the same steps will take any suitable PNG or JPEG image and get the dashboard to display it. The free program GIMP is going to do the tedious work.
As mentioned, the images must be two-colour only. If you're really talented, you can probably draw them for yourself. Less artistic types might be able to find a PNG image that is nearly two colours, then GIMP's Colors->Threshold... menu makes it pretty easy to change the in-between pixels into either foreground or background.
Once you have a strictly foreground/background image, you need to convert it to a PBM ASCII file.
In this case:
If you look at the exported file you'll see something like:
P1
# Created by GIMP version 2.10.22 PNM plug-in
30 30
0000000000011111111000000000000000000011111111111111000000000000001111
1111111111111100000000000111111111111111111110000000001111111111111111
1111110000000111111111111111111111111000001111111111111111111111111100
0011111000111111111100011111000111110000011111111000001111100111110000
0111111110000011111001111100000111111110000011111011111110001111111111
0001111111111111111111111111111111111111111111111111111111111111111111
1111111111111111111111111111111111111111111111111111111111111111111111
1111111111111111111111111111111111111111111111111101111111111111111111
1111111110011111111111111111111111111110011111111111111111111111111110
0111111001111111111110011111100011111100001111110000111111000011111111
1000000001111111110000011111111111111111111111100000001111111111111111
1111110000000001111111111111111111100000000000111111111111111111000000
000000001111111111111100000000000000000001111111100000000000
It's not as pretty as the one I typed in, but you can see that the elements are there: the 30 30 gives the image dimensions, and the lengths of the runs look the same as in the original.
One point at this stage. It's not clear to me how GIMP chooses which colour is background when exporting to PBM. The file above is what we want, starting with 0 (background). It's worth looking at the output and, if things are reversed, click GIMP's Colors->Invert menu and re-export. Alternatively you can go ahead and use the image using RLEJ0 instead of RLEJ1. This will swap the sense of which pixels are drawn and which are transparent.
There is a chance of getting an error message instead. The program only accepts PBM files that:
The error message should be pretty clear.
Following those steps with smile.pbm gives:
smile 30x30 {
    0b08130e0e120b1409160718051a0405030a0305030505080505020505080505
    0205050805050107030a0381bb011c021c021c0206020c020603060406040604
    0908090518071609140b120e0e13080b80
}
That's the converted image, ready to be included in the RLE section of a dashboard config.
Perhaps your car makes you happy whenever accel enrichment is happening and you want your dashboard to reflect this. We can use a BOOLEAN widget to show our smiley face at the appropriate times
Here is a dashboard with nothing else (could have made it a whole-screen smiley):
[global]
;
; Megasquirt INI file -- no default value.
;
SIG "MS2Extra comms342hU"
[RLE]
smile 30x30 {
        0b08130e0e120b1409160718051a0405030a0305030505080505020505080505
        0205050805050107030a0381bb011c021c021c0206020c020603060406040604
        0908090518071609140b120e0e13080b80
}
[+DLIST]
happy {
	abs
        movea 105 155 rlej1 smile
}
[PAGE]
main {
        dlist bluebg none none
        poll
        {
                ; poll the status flags
                engine { method=last }
        }
	;
	; How they are to be displayed
	;
        show
        {
                ; bottom right slot
                15 BOOLEAN {
                        var=engine ifhigh=happy mask=80 egval=16 fg=3
                }
        }
}
Looking firstly at the page definition, the BOOLEAN widget has been created in slot 15: the slot at the very bottom right of the screen. Like a BLANK widget, it won't draw anything, but that slot is unavailable to other widgets.
The engine channel is polled. The Megasquirt INI file documents the bits in this channel. In particular: bits 4 and 6 are tpsaccaen and mapaccaen respectively. When either bit is a 1, accel enrichment is being applied. To test for either bit we use the value 2^4+2^6=16+64=80 for mask. The egval=16 simulates TPS acceleration on its own.
Looking at the happy display list:
Here is the result:
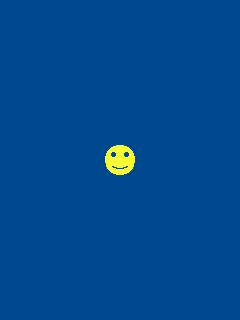
That looks pretty good. The colour came from fg=3,
yellow in the default base colours. However there is a problem.
With only an ifhigh option, that display list is run
on both low-high and high-low changes, just with
foreground and background colours swapped. Here's what you get with
egval=0:

Which might be suitable for Halloween.
The easiest solution is to add an iflow option to the widget. Here are the changes:
        ...
        movea 105 155 rlej1 smile
}
glum {
	abs
	fg bluebg
	movea 105 155 rectfill 30 30
}
[PAGE]
...
                15 BOOLEAN {
                        var=engine ifhigh=happy mask=80 egval=16 fg=3
			iflow=glum
                }
	}
}
happy runs as before, but only on low-high changes. The new glum display list deals with high-low changes. It overrides its foreground colour with the proper blue then draws over the face with a filled rectangle.
glum could have used RLEJ1, and only undrawn what happy had drawn. That would be fine, but bear in mind that each RLE instruction copies the entire block of numbers from the RLE section into the current display list. The right way to do this would be to put the RLEJ1 instruction in a separate display list. happy and glum would set up the colours and then JMP to the new display list.
BOOLEAN widgets are the only functional use of RLE images in the dashboard, but images can also be used just for good looks. Here we'll look at preparing a logo for the dashboard.
Here is what I got after about 15 minutes (including writing this
up):
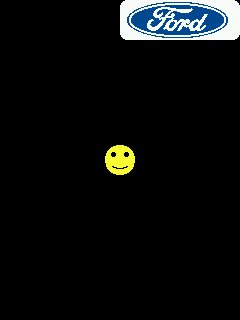
You can see it built on the earlier example and continues the happy theme. Here is the display list that drew the logo:
fordlogo {
        call blackbg
        fg bluebg bg base[1]
        movea 120 0
        rrectfillbg 120 40
        move 5 0
        rlej1 fordlogo
}
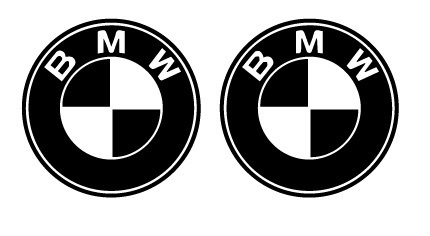
The Beemer logo is a tougher challenge. The hardest part is that it has three colours: black, white and blue. Not a huge problem: it can be painted layer by layer using RLEJ1.
Starting with this pair of logos, I:
Here is the display list that draws it:
bmwlogo {
        call bluebg
        movea 157 2
        fg base[0] bg base[1]
        rle bmwbw
        fg bluebg
        rlej1 bmwblue
}
And here is how that looks:
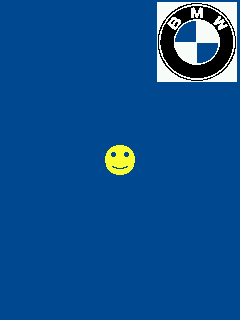
I was lazy and drew black and white together with rle. It could have been a proper circle if I'd split it into separate black, white and blue layers (white leaving out of the corners of course), and drawn all three with rlej1. The way it is doesn't look too bad, and was less than 15 minutes effort.
Here is a larger logo:
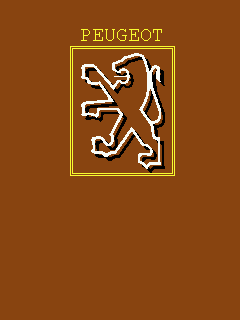
It's not that I think it looks great, but there are some interesting points in the display list which you might consider.
puglogo {
        call brownbg
        fg base[3]
        movea 80 28 text "PEUGEOT"
        move -92 20 east 100 south 125 west 100 north 125
        move -2 -2 east 104 south 129 west 104 north 129
        fg base[0] move 15 11 call plogo
        fg base[1] move -4 -4 jmp plogo
}
plogo {
        rlej1 puglogo
}
Things to note:
There is no textj1 instruction at this stage, so you'd have to convert your text to an image if you wanted to do the drop shadow trick with some text. It's also what you have to do if there's some BIG FONT you want in your decor.
Another thing to bear in mind when converting images is that RLE performs very badly with speckled areas (you may have experienced this with a fax machine). In the worst case, with alternating black and white pixels, you'd end up with a run for each pixel, and all runs length 1. "Compression" makes it bigger. Aim for images with solid blocks of colour.
Here's hoping all of this has made sense without putting you off the whole idea.